Saturday, October 4, 2014

Halloween Spirit

Halloween Spirit. I can't believe it's already October!  Seems like just the other day we were starting school. Now that it's here... it's time for some decorating!  Decorating for Halloween/Fall comes in a close 2nd to Christmas. As I type I even have instrumental Halloween music playing in the background. I love it! In the years past I decorated more for Fall using pumpkins and leaves so I could leave everything up until I switched for Christmas. I wanted a bit of change this year though... something a bit spoookier!  I've been seeing Pinterest overflowing with decoration ideas. I also wanted to use my apothecary jars.  
Here's some ideas I pinned to help inspire this year's decorations:


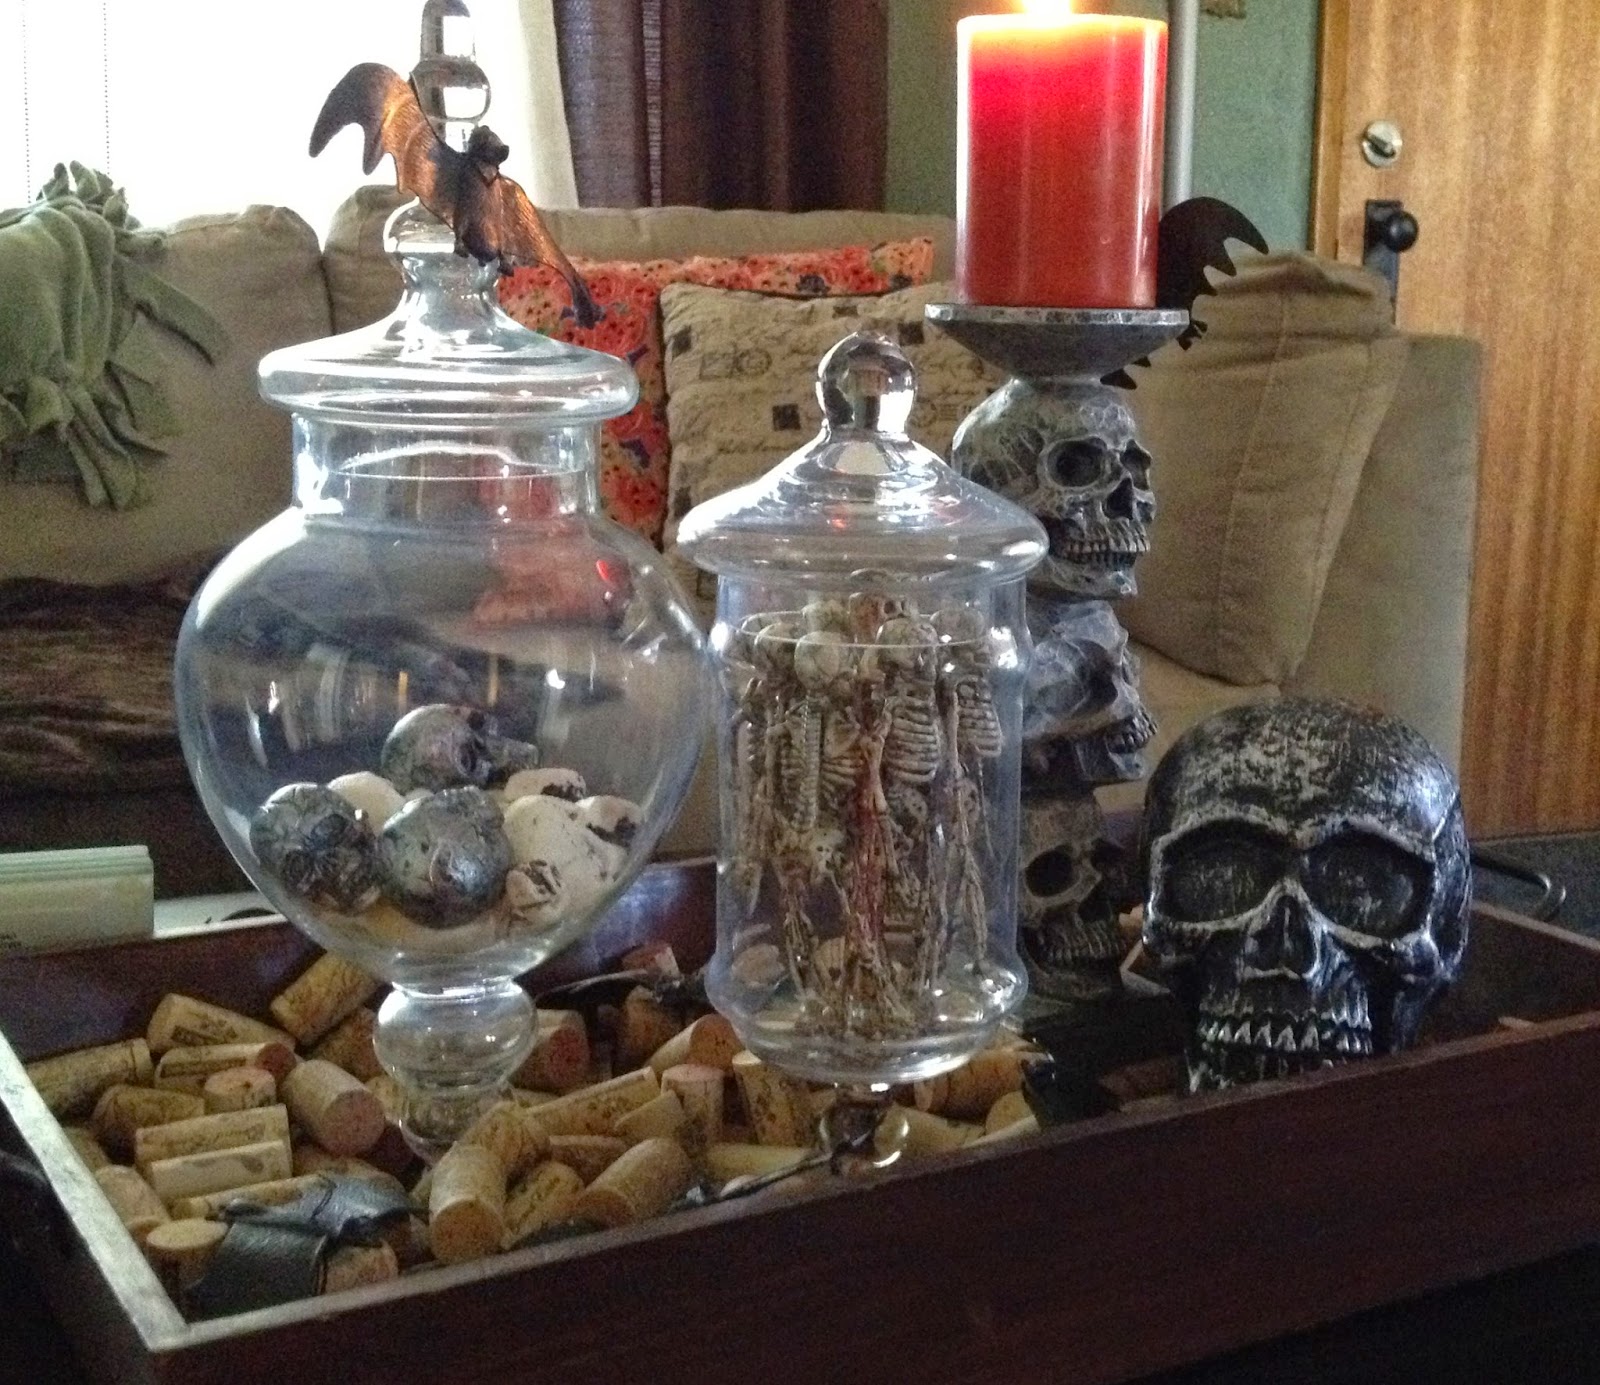
I started looking for new decorations for the last few weeks and finally put things together this morning. Here's how they turned out:

On the other side of the pumpkin is a 'jack-o-lantern' type face. You can see it through the window!


Just loved finding these mini skeletons! 

Watch out for rats on the loose!
For now... that's what I have. I'll keep an eye out for other decorations for around the house. I also want to decorate the front porch. I have some 'webs' that I'll stretch across the corners but I'd love to add one of those chalkboard signs with a fun Halloween saying.  Just need to find one!  I'd also love to create some pillows similar to these for the couch:


Halloween spirit is in full swing!  Now we just need to decide this year's costumes. We ALWAYS wait until the last minute. Which I hate because we end up paying an arm and leg!  We always incorporate the 'girlfriends' into our costumes so that makes it a bit challenging at times but so cute in the end!  Here's some of our last couple years:

Yee Haw!

To protect and serve!
Can't wait to see what this year will bring... we've been talking about Scooby Doo?!  Koda as Scooby Doo, Mishka as Scrappy-Doo and Tyler and I could be Fred and Daphne!  How fun would that be?!   Guess we'll see what we can find in the next few weeks!  Until then...


Tuesday, September 23, 2014

My Classroom & Our First Weeks

A Peek into my classroom. First of all, I hope to take more pictures soon... Some close ups on the different areas but for now I took a few pictures to use on my school website to update from last years. Here's the view from all four corners of the room (again, I apologize it's hard to see anything up close):


First week of School.  Can you believe we've been back for almost 3 weeks?! I can't believe how it flies by. Every year seems quicker and quicker!  Here's a few anchor charts we created in our first couple days as we tried getting back into the routine of school!

First Day Jitters.

Even though some kids have heard the story before... I like to read First Day Jitters to help remind them that even the teacher is nervous on the 1st day of school!


So cute! Especially because our school is SO small there's really only two hallways. One for the K-1 and the other is 2-4!


Dream Jobs. In the first few days we also like to brainstorm our 'Dream Jobs' to help emphasize that my students' current job is 'school' and they have to work hard to be 3rd Grade All-Stars so they'll be one step closer to finishing grade school, middle school, high school, and hopefully onto a technical, 2-year, or 4-year school to help in pursuing their Dream Job.


Each student then created a 'craftivity' for our bulletin board showcasing their Dream Job!
Choosing Books. As every teacher knows, helping students correctly choose their books will help them as a reader leaps and bounds!  We review the different ways they choose books and then work towards making sure their choices are 'Just-Right' or a Good Fit for them at this time.  


Setting up Rules & Expectations. Each year we work to create the rules and expectations together. We brainstorm different ideas that will help them to do their best learning in the classroom as well as being safe. We then incorporate each idea into our classroom Behavior Slips.


Finished 'Thinking Journals'.  In a previous post I was working on each students' Thinking Journal that we'll use for small group work in reading and responding to reading/writing and they're finally done!!


Open House/Parent Night. In just a couple days we have our Open House/Parent Night and I can't wait to see &/or meet the families again! Each year I try to incorporate a little goodie for my families that are able to come back after hours and help support their child's education. I found an idea on Pinterest. Of course!  Also liked this idea because it incorporated a 'healthy treat' with all our new FDA laws/recommendations I figured an apple would be better than something sweet!  They were easy to assemble too!

Pinterest idea.

Used twine I had instead of buying ribbon.


Printed tags from the 'Printed Press' blog and signed my name. I'll try to attach the link... if I can figure that out?


All ready for Thursday's Parent Night!!
 Well. It's been a FAST three weeks. This is just some of it in a nut shell. I'm hoping to get better at juggling all this new curriculum as well as keeping things updated. One. Step. at. a. Time!


Tuesday, August 19, 2014

Sharpie-like DIY Mugs


Sharpie-like Mugs. So I've seen on Pinterest the DIY Sharpie mugs that you can create. Cute quotes... initials... the ideas are endless. My sister-in-law's birthday is tomorrow and my younger sister's birthday get-together is this upcoming Saturday so it gave me the perfect opportunity to try out this DIY craft! I'd make one for myself but Ty would kill me if I bought another mug that was going to somehow cram into the already overflowing cupboards. :/ So here's the inspiration idea I found on Pinterest:


Supplies:
mug (bought at Walmart)
stickers (you should choose a wider 'font' style... mine are pretty thin)
porcelain art pen (this was leftover from a Starbucks' mug I decorated)

Here's how I put them each together:

Place your stickers on your mug

Start 'dotting' around each letter. You'll notice I left more space around each letter because my stickers were so thin. Start close and then spread out.


Peel off the stickers

Since it's my sister's 30th birthday I decided to put a small 30 so she'll remember what year it's from. :)

I saw this quote near the '30's' cards and thought it was fun.
Outlining my sister-in-laws name...again leaving space around the stickers.


She enjoys different teas so I saw this idea on Pinterest and decided to keep hers simple. Less is more sometimes you know?


Once your designs are completed wait an hour (these are the directions on the porcelain pen/Starbucks instructions). After an hour you'll put them in the oven at 450' for 20 minutes. I place the mugs on a small cookie sheet to make it easier putting them in and taking out of the oven. Let them cool for 1-2 hours and you're done! Supposedly they should still be microwavable and dishwasher safe... guess I'll have to wait and see what they say?!

Now I just have to put together each mug with some goodies. I still need to gather up the goodies for my sister's mug (I'll update with pictures once I have them) but my sister-in-laws was simple because she's trying to save to buy a house! Yea! So I took a tea bag and cut a little slit and emptied the tea. I carefully tucked in some money. A much cuter way to give money... instead of just in the card don't you think!
Money tea bag:
I'll secure the bag with a little tape inside the mug and on the outside for the piece hanging off